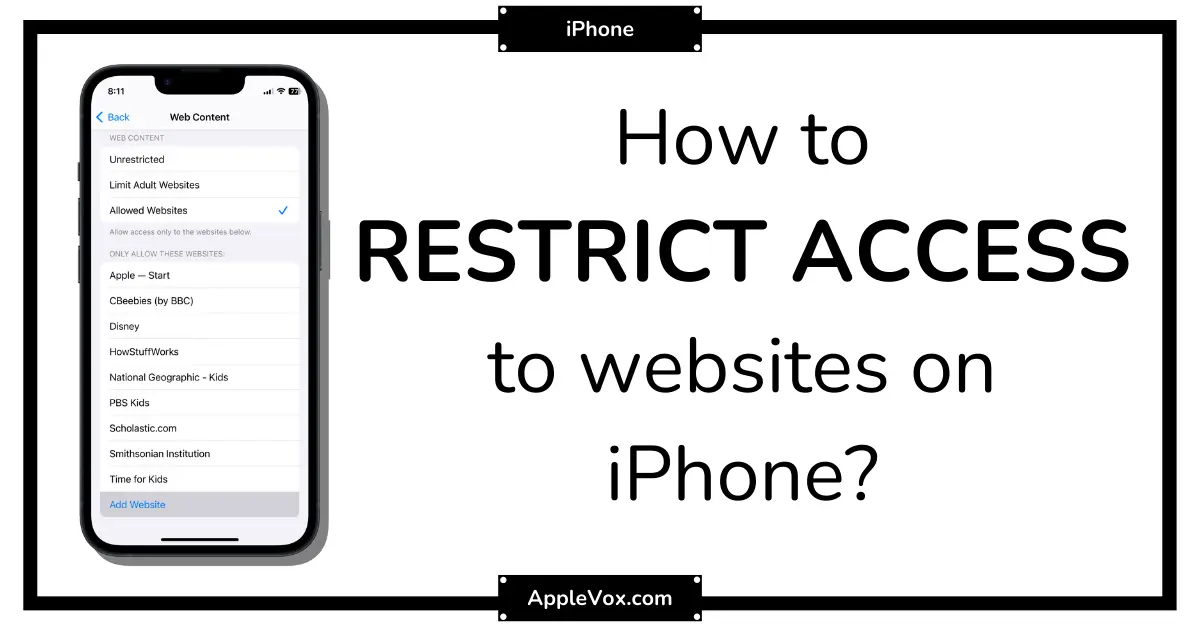
To block websites on an iPhone, navigate to Screen Time settings and use the Content & Privacy Restrictions feature. From there, you can add specific websites to the block list.
The iPhone’s native Screen Time function offers a seamless solution for controlling the content that can be accessed through its web browsers. By leveraging this built-in feature, parents can easily manage their children’s internet exposure, and individuals can limit their browsing distractions.
Fine-tuning an iPhone’s functionality to ensure a safer and more focused online environment is straightforward. With just a few taps, you can customize which websites remain reachable and which are off-limits, creating a catered internet experience that aligns with your personal or family’s values and requirements.
Introduction To Website Blocking on iPhone
In an era where digital information is at our fingertips, it becomes increasingly important to have control over what we can access on our devices. The iPhone, synonymous with sleek design and user-friendly experience, also offers robust features for managing personal online safety and productivity.
Website blocking is one of these essential features, providing users with the ability to curate their Internet experience. Whether you’re a concerned parent, a productivity seeker, or simply looking to limit distractions, understanding how to block websites on your iPhone is pivotal.
Understanding The Need For Blocking Websites
Digital well-being and online safety are paramount in the contemporary world where the line between the virtual and real is increasingly blurred. Here’s why you may consider blocking websites on your iPhone:
- Parental Control: Protecting children from inappropriate content by restricting access to certain websites.
- Productivity Enhancement: Eliminating distractions by limiting access to time-wasting sites during work or study hours.
- Personal Discipline: Helping oneself adhere to self-imposed restrictions on browsing certain types of content.
- Security Measures: Blocking websites that are known to be malicious or compromise your data privacy.
Built-in Ios Features For Website Blocking
Built-in iOS Features for Website Blocking offer a measure of control and protection for iPhone users, particularly those concerned about accessibility to inappropriate content or distractions. With just a few taps, you can regulate what websites are accessible on your device, or that of your child’s, ensuring a safer and more focused online experience. No need for third-party apps, as Apple’s own iOS provides efficient tools to customize your web browsing restrictions right from the settings.
Using Screen Time To Block Websites
Screen Time on iOS is a robust tool not only for monitoring device usage but also for imposing restrictions on specific websites. To use this feature:
- Go to Settings and tap on Screen Time.
- If not already in use, tap Turn On Screen Time and follow the setup instructions.
- Once Screen Time is active, tap Content & Privacy Restrictions.
- Enter your Screen Time passcode if prompted.
- Tap on Content Restrictions, then select Web Content.
- Choose Limit Adult Websites or Allowed Websites Only to manage access.
- To add a website to the ‘Never Allow’ list, tap Add Website under the ‘NEVER ALLOW’ section and enter the URL.
Customizing Restrictions With Content & Privacy Restrictions
For parents and guardians aiming to create a tailored online environment, Content & Privacy Restrictions provide an extra layer of customization. To adjust these settings:
- Navigate to Settings, select Screen Time, and then Content & Privacy Restrictions.
- Toggle on the Content & Privacy Restrictions option.
- Tap on Content Restrictions, then Web Content.
- Select Limited Adult Websites. Here you can add specific sites to an ‘Always Allow’ or a ‘Never Allow’ list by tapping Add Website in the respective section.
- You also have the opportunity to only permit certain websites through the Allowed Websites Only option, making sure only pre-approved content is accessible.
With these iOS features, you’ll efficiently manage web access and maintain a user-friendly and secure browsing environment on your iPhone.
Third-party Apps For Website Blocking
While iPhones come with built-in features that allow for some level of content blocking, third-party apps often offer a more versatile and granular control over website restrictions. For parents, employers, or individuals looking to reduce distractions, these apps provide tailored solutions to manage and monitor internet usage. Explore the variety of options available for iPhone users seeking to block websites effectively.
Overview Of Popular Third-party Apps
Multiple third-party apps stand out for their robust website-blocking capabilities on the iPhone. These apps not only limit access to inappropriate content but also help you focus by blocking distracting websites during work or study hours.
- Freedom: With an intuitive interface, Freedom allows users to block sites across all their devices.
- OurPact: Specifically designed for parents who want to control their child’s internet access and app usage.
- 1Blocker: A user-friendly app offering customizable content blockers for Safari.
These apps provide powerful tools for those seeking better digital well-being and productivity, with additional features such as scheduling, tracking, and varying levels of protection to suit different user needs.
How To Use Third-party Apps To Block Websites
Implementing third-party apps to restrict website access on an iPhone involves a few straightforward steps that enhance control over your digital environment:
- First, choose a third-party app suitable for your needs and download it from the App Store.
- Once installed, open the app and create a user account if required.
- Navigate to the app’s website blocking section and specify the sites you wish to restrict.
- Adjust settings to block access to these sites entirely or set specific times during which the sites are inaccessible.
- Many apps also allow you to group websites into categories that can be blocked with a single toggle.
- Utilize additional features like tracking and reports to monitor usage and adjust restrictions as needed.
Through these steps, users can create a more focused and distraction-free experience on their iPhones.
Blocking Websites Through Browsers
In this digital age, the ability to focus and safeguard our digital environment from distractions or inappropriate content has never been more crucial. For iPhone users, controlling the accessibility of certain websites is paramount, especially for parents monitoring their children’s online activities. Thankfully, iOS offers various methods to block websites directly through browsers. Below are strategies to effectively apply these restrictions, ensuring a safer and more productive browsing experience.
Using Safari’s Built-in Website Blocking Features
The default browser on iPhone, Safari, comes with a handy feature that makes website blocking straightforward. To utilize Safari’s blocking capabilities:
- Open the Settings app on your iPhone.
- Scroll down and tap Screen Time.
- Tap Content & Privacy Restrictions and enter your Screen Time passcode if prompted.
- Enable Content & Privacy Restrictions by toggling the switch.
- Tap Content Restrictions, then Web Content.
- Choose Limit Adult Websites to block adult content automatically or Allowed Websites Only to whitelist specific sites only.
- Under the NEVER ALLOW section, tap Add Website and enter the URL of the website you wish to block.
By following these steps, specific websites will become inaccessible through Safari on your iPhone, helping to maintain a controlled browsing environment.
Blocking Sites On Alternative Browsers Like Chrome Or Firefox
Blocking websites on browsers other than Safari, such as Chrome or Firefox, can be a bit more complex since iOS’s built-in restrictions primarily cover Safari. Nevertheless, you can take steps to manage website access:
- Install Content Blocker Apps: Look for apps on the App Store that offer content-blocking features and are compatible with the browser you use.
- Adjust Settings in Each Browser:
- For Chrome, you can add website-blocking extensions if using the desktop version and sync settings to your iPhone.
- Firefox offers add-ons for content blocking that can be enabled from the Firefox Add-ons menu.
- Utilize Third-Party Parental Control Services: Services like Qustodio or Net Nanny offer cross-browser website blocking and can be set up on your iPhone.
It’s crucial to remember that non-Safari browsers might require additional tools or services to achieve the same level of content restriction.
Frequently Asked Questions Of How To Block Websites on iPhone
Can You Block A Specific Website on an iPhone?
Yes, you can block specific websites on an iPhone. Go to Settings, tap Screen Time, and navigate to Content & Privacy Restrictions to set this up.
How Do I Permanently Block A Website?
To permanently block a website, use browser extensions like “BlockSite” for Chrome or Firefox, or edit your system’s “hosts” file to redirect the website’s URL to 127. 0. 0. 1. Remember to save the changes.
How Do I Block Unwanted Websites On Safari?
To block websites on Safari, open ‘Screen Time’ in ‘System Preferences. ‘ Add undesired sites to the ‘Never Allow’ list in ‘Content & Privacy. ‘ Save your settings.
How Do I Block Certain Apps On My iPhone?
To block apps on your iPhone, go to Settings, tap ‘Screen Time,’ and choose ‘Content & Privacy Restrictions. ‘ Enable restrictions, select ‘Allowed Apps,’ and toggle off the apps you want to block.
Conclusion
Blocking unwanted websites on your iPhone is straightforward. With tools available in Settings or through third-party apps, you’re in control. Maintain productivity, ensure a family-friendly web experience, and protect privacy with these simple steps. Empower your iPhone browsing and enjoy a safer, distraction-free digital life.

